(To go directly to the tutorial, roll mouse over picture and click “see all steps”, then click on “Denim Dog Leash” at top left corner!)
Make your own Denim Dog Leash!
Loving the “Mozaic” Quilt!
The other day while “researching” quilt blogs (ha-ha, I like to tell myself I NEED to look at other quilt blogs in order to make sure I am keeping up with the trends!) I came across a quilter who had made quite a few quilt tops using a pattern called “Mozaic”.
The blog, Shey’s World of Stitchin Magic does not appear to be an active blog. You’ll notice if you visit the site that the last post was in March. However, I did want to give Shey full credit for all of the tops you see here. They are all hers and I just LOVE them. Who knows, maybe she’ll pick things back up and start blogging again!
After seeing these quilts, I was motivated to do some searches online to find the pattern. Unfortunately, I came back empty handed.
I finally found some information on her blog about where she originally took the class and was able to track down the shop selling the pattern.
The pattern was written by Marie Anderson of the Material Girl Quilt Shop in Apopka, FL. They don’t have it listed for sale on their website but I emailed the shop and they arranged to mail me the pattern. True to their word, I received the pattern in the mail a few days later. (Yeah!)
It’s not a difficult pattern (my favorite) and it is designed for fat quarters (another favorite)!
Here are examples of the quilt made by Shey. She’s made quite a few. VERY inspiring!!

Halloween….(I just LOVE Halloween fabrics so this one really appeals to me)!!


I really like this “St Patrick’s Day” version!!

This reminds me of stained glass…so nice!

Notice how all of the fabrics used in the center of the quilt are also used in a scrappy border.
A 56” x 56” quilt only requires 9 FQs. A 56” x 70” requires 12 FQs. This just looks like such a fun quilt and the results are stunning!!
I can’t wait to find some time to make this!
Taking Photos of the Rag Bag and the NEW Fangled Snap!
It’s never easy to get the best photos of my creations. I take a TON of photos but in the end I’m usually pretty happy with the results!
Of course, once I get the photos then I have to wrangle with the colors to get them to look as realistic as possible!
Here are some photos of my latest Rag Bag made from recycled denim jeans. If you’d like to see more, the pattern can be found here: Denim Circle Rag Bag.

I have to say I REALLY like the outdoor summer shots. All the beautiful green in the background. The grass, the trees…

It’s not super easy to see in this shot but I REALLY like these new magnetic snaps! You SEW them directly onto the bag!!! How cool is that. They’re made from a soft plastic and there is a small channel to guide your stitches. The plastic is very soft and easy on your needle.

Here’s a more detailed shot…see the circular channels? You sew directly in the channels. It’s very easy and best of all, you can attach the snaps after you’re ALL DONE with the purse.
I don’t know about anyone else but I have DEFINITELY made a purse and realized after it was too late that I forgot to attach the snaps!
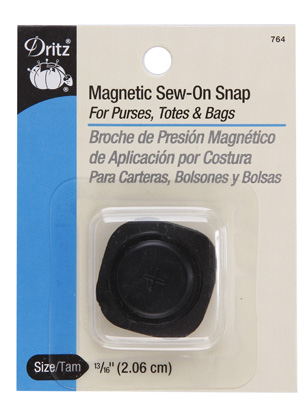
Here’s a place to get them online for a really good price!
http://www.createforless.com/Dritz+Magnetic+Snap+Sew+In+Square/pid144713.aspx
Die Cut Rag Circles!
Hello all,
I have been very busy over here (but who’s not, right?) :)
I’m in the process of having my brand new “Inventive Denim” website designed, writing new patterns, planning for some upcoming shows and classes and preparing to release my brand new DIE CUT, PRE-FRINGED denim circles!
Whooo-HOOOO!
Die cut pre-fringed circles you say? How did that come about?
I wanted to improve my Denim Circle Rag Quilt by coming up with an easier way to make it. I wanted people who didn’t have the time or desire to cut the circles, the opportunity to make it as well.
I started by having a custom die made with the shape and size you might expect (if you’re familiar with my denim circle pattern). A 6 1/2” circle with fringe. Sounded perfect so I placed the order and got busy making quilts. Uhhhh…small problem. I wasn’t happy with the finished product.
The fringe could be seen peeking through the back of the quilts after washing and drying. Now it didn’t poke through a TON but enough that I felt with repeated washings and usage, you would eventually end up with little “poofs” of denim fringe poking through the back of the quilts where ever the seams intersected!
NOOOOOOOOOOOO! Please don’t tell me my brand new, custom designed die doesn’t work!
So, after a few days of extra chocolate intake to reboot my brain I started all over.
Why didn’t it work? What could I do differently? It took a while but I finally came up with a design that does work. And works PERFECTLY! I love it!
I have signed on a few pattern testers and they will be busy helping me with my new table runner pattern using the die cut denim circles. (Thank you pattern testers- you know who you are)!!!
Just as soon as they’re done you’ll be seeing a new pattern available in conjunction with die cut circles!
Here are a few pictures of a table runner I just made using the die cuts. L-O-V-I-N-G it! :) What do you think?


Subscribe to:
Comments (Atom)