Showing posts with label rag quilt. Show all posts

Denim Jean Pattern...(cont)


Update:  The pattern is complete!
You can purchase a copy at my Etsy Shop:


So...in order to stay focused on getting this pattern done, I've been getting up early before work to practice. 


I'm trying to get this down to a science.  It's not easy to translate what I know how to do in my head into written, easy-to-understand directions!  :)


Continuing from the other day...I've figured out how to maximize the number of circles I can get from a pant leg.  In this case, I was able to get 16 circles from one pair of jeans- NOT BAD!


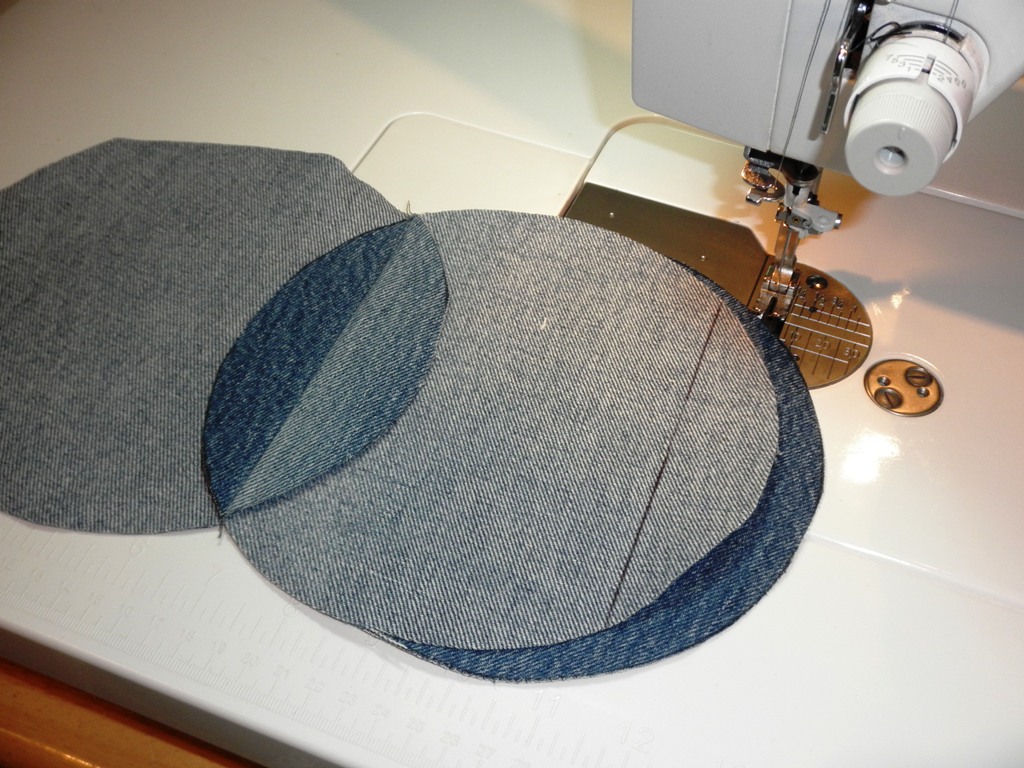
It's taken me a while (and a LOT of practice) to get my measurements down to a science.  Since I'm making this up as I go, I've had to play with the exact measurements for sewing between circles.  I needed a size that would fit a charm square and still show off the fabric in the middle. 

I've made and remade these circles SO many times in order to finally get all of the measurements just right!  I am very pleased with how it's worked out! 


Sewing the denim circles end to end is actually quite easy now that I have a method for measuring consistently.  I never thought about it before but it's not easy to know how to measure from the end of a rounded edge!! ;)


I was honestly able to whip these out pretty quick!  It was fun and when I was done I was able to better envision what it would look like when finished!!


Although the pattern is for a quilt, I am making a table runner right now in order to practice the steps more than once. 

More pics to come with the charm squares inside! 

See ya and thanks for sharing the process with me!!

Heather


Progress on my New Pattern

Update:  The pattern is complete!
You can purchase a copy at my Etsy Shop:
Recycled Denim Jeans- Rag Quilt Pattern


I have posted several times in the past about the progress of my recycled denim jeans quilt. As I progressed I got some great feedback and I decided to turn it into a pattern.

I'm about a third of the way through the pattern draft and have been taking pictures along the way which I'd like to show here.

I've been thinking about how to help people can get the most possible usable yardage from each pair of jeans. 
I've found that if you cut the legs off just under the pockets and then cut down the inside of each leg seam, you'll get the maximum amount of fabric.

One pant leg cut open looks like this...


AND interestingly enough, I've found that if you start tracing circles at the Bottom of the pant leg you will get MORE circles then if you start tracing at the top.  I don't know why but somehow I'm maximizing the length better by starting at the bottom!  

As far as cutting out the circles, I've been going back and forth between using use a cardboard template for tracing the circles or using the Olfa circle cutter.


 OR


There are advantages to both and I'm trying to decide which one to recommend or to just talk about both.  I don't want to make things too complicated though...

I think the biggest challenge about this quilt is actually making the circles.  I've been doing a LOT of research and it's surprising but there are no really good ways to cut accurate circles.

Anyway, back to the drawing board (literally)!  
Heather

Finished the Denim Quilt!

Update:  The pattern is complete!
You can purchase a copy at my Etsy Shop:
So I finally finished clipping the jean quilt, then brushing, washing and drying and here are the finished results!


I love the way it turned out.  I thought I liked it before I clipped it but I really like it now that it's been clipped and washed.


I've made this type of quilt in the past and this time I decided to "prep" the raw edges prior to washing and drying.  I've noticed that sometimes these kind of quilts need to be washed several times to get the full fraying effect. 


So, this time I "brushed" the raw edges with a hard bristled plastic brush- think of your toliet bowl brush- the kind with really stiff bristles (I didn't use a toliet bowl brush, however!).


Here's what the quilt looked like as I progressed.  I scrubbed the edges backward and foreward before it ever went into the washing machine.  It was really frayed and oh-my-gosh it sure shed!


It seemed to do the job, though, because it came out of the dryer (first time) perfectly frayed! 


I just love this type of quilt and I love that I am using up someone's discarded jeans to make a whole new creation.


Thanks so much for stopping by!
Heather  :)

Love the Denim!

Update:  The pattern is complete!
You can purchase a copy at my Etsy Shop:


So, I've been working on my own method for making a rag quilt with circles instead of squares.  I've seen other people make quilts like this but have never seen a good method describing how to make one so I decided to come up with my own.


So far, I'm liking it!!  :)


I used 4 charm square packs to make this one.  It's pretty big and extra long.  (It's nice when a quilt can cover you from head to feet!)


Notice it was almost impossible to take pictures without the dogs getting in the way.  Oh well, they provide scale!!


What do you think?


This is what it looks like prior to me making any "cuts".  I actually like it this way but have noticed that it doesn't wash really great unless the edges are clipped.


There are about 10 pairs of jeans in this one (I think).  Of course, it won't be washed until I'm done clipping all of the seams.


I'm trying to spread out the clipping so it doesn't aggravate my hand and arms.  Although I do have  spring loaded scissors that are very sharp and this seems to make all the difference.  I can't imagine doing this without the spring loaded ones.


This is the view of the back...


Having lots of fun!  Thanks for stopping by!

Heather

Total Pageviews

Related Posts Plugin for WordPress, Blogger...